 |
| Ginger's lovely roulettes |
Thursday, 14 April 2011
Insomnia Pottery Workshop
This is a lovely blog: http://gingersteele.blogspot.com/ Lots of great tips and tricks. Stacks of fine examples of how to go about printing and incising clay.


Tuesday, 12 April 2011
Reflections on organic architecture
Well it's been nearly a month since I've visited here. There's lots to catch up on... and this will be the first of (I hope!) 3 posts today.
First of all, the outcome of my last college project (known as Module AD210 Critical Research Study), the one where I had to write a critical research essay and then make a ceramic work in response to that (see http://ambientceramics.blogspot.com/2011/01/going-round-in-circles-as-usual.html). I chose 'organic architecture' as my subject for the essay. Last time I posted about this work, it was biscuit-fired and ready for its final firing. I knew, from testing, that any temperature over 1100 degrees centigrade would cause the work to collapse, however I needed a high temperature firing to get the piece strong enough to survive in the long term. After much deliberation, consultation and a variety of tests, I came to the conclusion that the only way to ensure the piece would keep its shape during a stoneware firing was to suspend it, unglazed, upside down before putting it into the kiln. This was no mean feat and I couldn't have managed it on my own. The ever-practical Steve very kindly came to my rescue. Between the two of us, with input and advice from Jess and Andrew, we managed to get the work balanced safely on to kiln props directly on to a kiln shelf:

 I was quite pleasantly surprised by the quality of the finish of the spray paint and, although it wouldn't be the usual first choice for surface decoration for my ceramic work, it did the trick nicely on this occasion.


First of all, the outcome of my last college project (known as Module AD210 Critical Research Study), the one where I had to write a critical research essay and then make a ceramic work in response to that (see http://ambientceramics.blogspot.com/2011/01/going-round-in-circles-as-usual.html). I chose 'organic architecture' as my subject for the essay. Last time I posted about this work, it was biscuit-fired and ready for its final firing. I knew, from testing, that any temperature over 1100 degrees centigrade would cause the work to collapse, however I needed a high temperature firing to get the piece strong enough to survive in the long term. After much deliberation, consultation and a variety of tests, I came to the conclusion that the only way to ensure the piece would keep its shape during a stoneware firing was to suspend it, unglazed, upside down before putting it into the kiln. This was no mean feat and I couldn't have managed it on my own. The ever-practical Steve very kindly came to my rescue. Between the two of us, with input and advice from Jess and Andrew, we managed to get the work balanced safely on to kiln props directly on to a kiln shelf:
 |

So... off into the kiln it went and I waved it goodbye. We were all pretty dubious about whether it would survive intact, in particular with the weight of the rings pulling down on the base, whether they would hit the kiln shelf and warp the whole thing out of shape... In the end, we all just agreed that, whatever happened, it would be a good experiment to see just how far we could push the clay body....
So I returned to college the following week, expecting the worse... and was really delighted to find that, not only had it survived but the rings had held their shape really well and the only part that had distorted was the big flat base (which I hadn't liked) which now had a lovely organic curve to it.
Now came the question of surface decoration... I didn't like the piece unglazed - the stoneware buff clay was neutral in colour - quite uninteresting - and I really wanted the piece to have a shine to it to intensify the effect of any light falling on to it. I decide to spray paint it! I went off to B&Q to see if they had any spray paint that would do the job.... they had about a 100 different colours! After about 20 minutes of indecision, picking cans up, putting them back down, I went for a silvery finish:


The following is a selection of pictures from my project. One of the real fun parts of making this work was in photographing it. The piece made the most beautiful shadows and I spent far too many hours photographing it (and some of my other test pieces!) from every conceivable angle...
 |
| Module hand-in display including a photo board with some of my pics |


So... now I await my results in terms of mark for my essay and for my ceramics!
Monday, 14 March 2011
Salt of the earth
Last weekend, I had the pleasure of joining a gang of 10 other potters (plus one painter and one landscape designer...) to help reconstruct a derelict salt kiln at Ray Pearson's ceramics centre at Newton Arlosh, in Solway. It might sound like a strange way to get my kicks (and there were a few confused expressions from the lads at work when I said I was missing The Home Gyem this weekend to head off West and build a salt kiln instead) but it was the best and most rewarding weekend I've had for a long while. Having said that, I'd been to Solway Ceramics Centre before so I wasn't expecting anything less!
Ray and Coralin Pearson are two of the nicest people you could ever wish to meet; their warmth and hospitality are amazing. I relax completely from the minute I arrive at their place. The Centre has everything:- a huge studio, with a lovely log fire, where Ray does his teaching, and where a whole host of potters of international fame come to demonstrate their techiques; every kind of kiln imaginable; good overnight accommodation for students and guests; a big shared kitchen and living area for lunchtime and evening get-togethers - with a massive kitchen table around which to share a communal meal, a few drinks and a good many potters' tales...

The whole thing had been reconstructed on the Solway site but the archway had collapsed shortly afterwards and it had stood unused since. During a previous visit, a few of us from the College had volunteered to get it rebuilt and back up and running, and eventually we got ourselves organised to go and get the work started.

The first job was to dismantle the existing kiln to below the start of the arch, and to sort and clean the bricks. The bricks used were fire bricks of various kinds. I must admit to having known little about the construction of outdoor kilns before this weekend, and I still have a lot to learn! For a start, I was amazed to find out how many different kinds of bricks there were. The kiln has a inner lining of high firing bricks that can withstand stoneware firing temperatures (up to 1300 degrees centigrade), and then an outer lining of insulation bricks of various kinds which have a lower temperature threshold and are used mainly as an additional lining to prevent heat escaping from any gaps in the course of fire bricks.
Whilst a group of us were cleaning and sorting the bricks, Andrew (our star technician) and Steve set about making the former on to which we would construct the brick archway:


Dave and Hilary beavered away at the back.... and after a good few hours work, the kiln really began to take shape:


It felt like a great achievement - it's a wonderful kiln and it was so good to help ressurect it. We were short of a few bricks to complete the job but Ray will get these and the plan is to return in a couple of weeks and complete the job. Once all the bricks are in place, the first thing that will be done is to burn out the wooden arch former and ensure that the arch holds in place. I can't wait to get back there to see what happens!
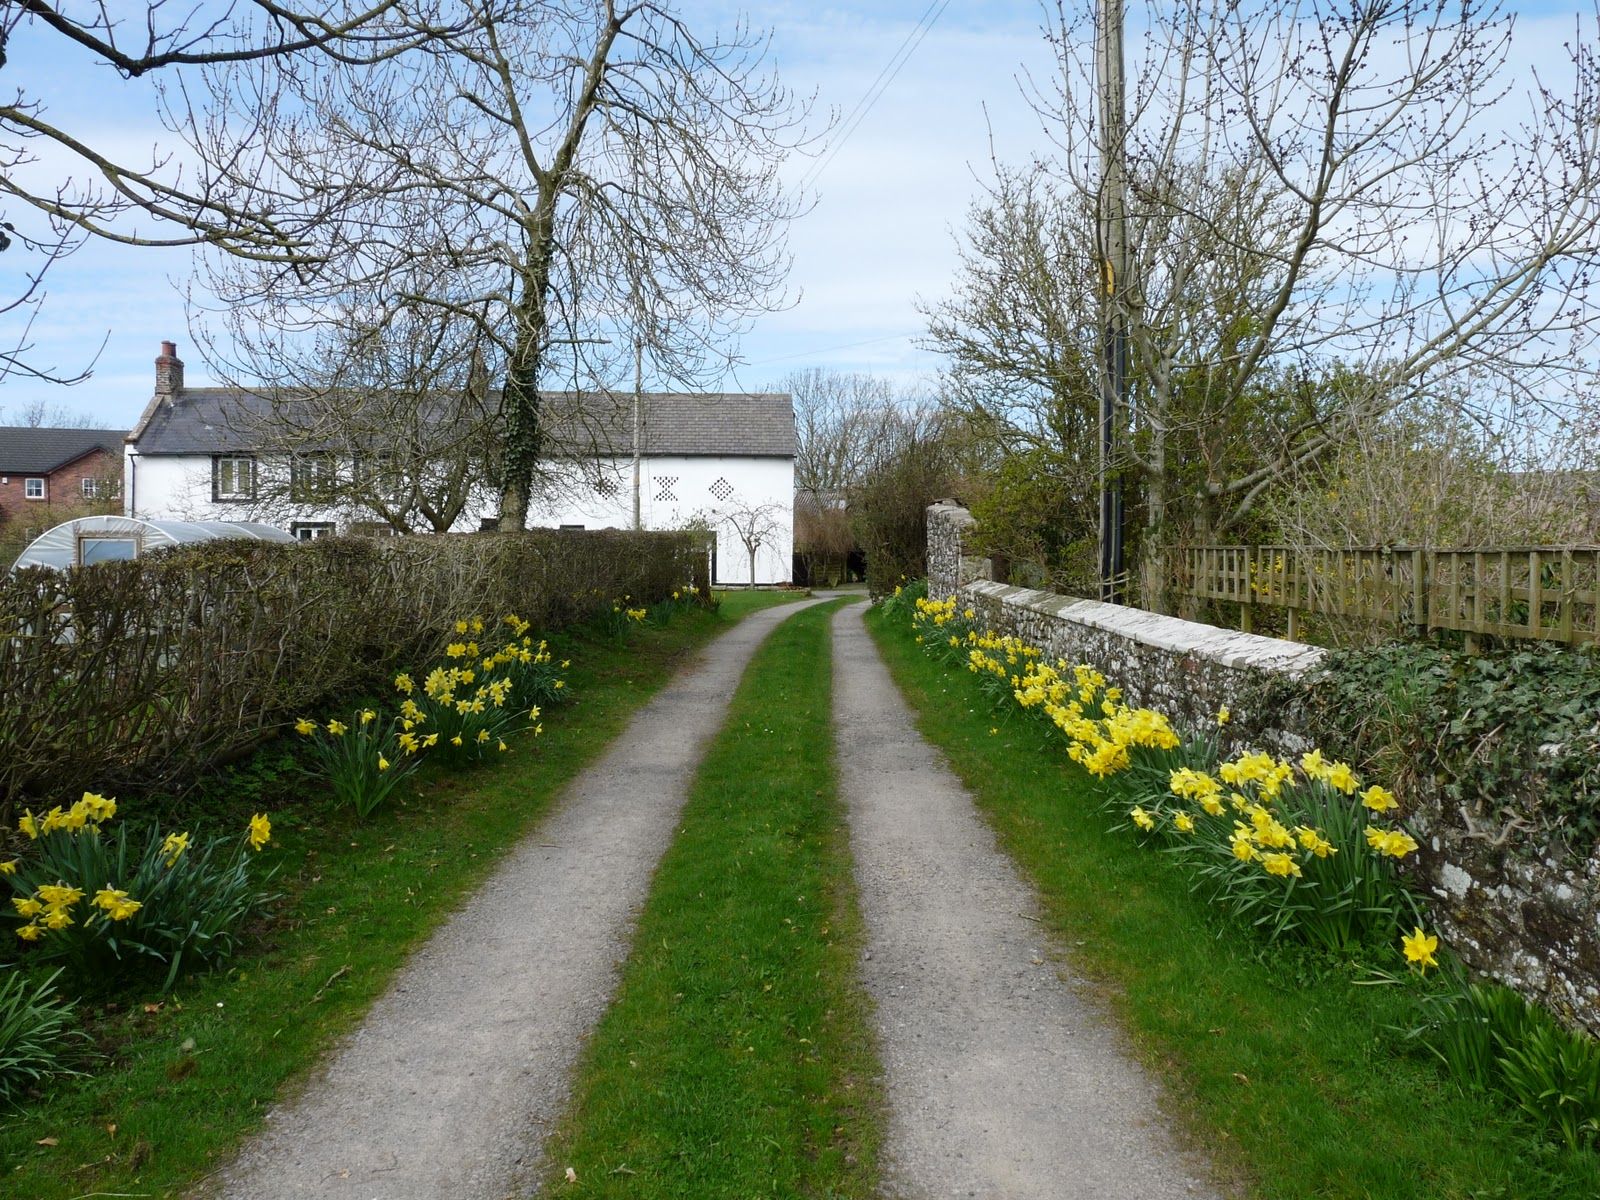 |
| Entrance to Solway Ceramics Centre, Newton Arlosh |
Definitely check out their website for more info about the Centre and details about the pottery courses: http://www.solwayceramicscentre.org.uk/
The salt kiln had been out of action for a while. Ray had bought it down in Devon a few years ago, and transported it, in pieces, back to Cumbria!

The whole thing had been reconstructed on the Solway site but the archway had collapsed shortly afterwards and it had stood unused since. During a previous visit, a few of us from the College had volunteered to get it rebuilt and back up and running, and eventually we got ourselves organised to go and get the work started.

Brick mayhem
The first job was to dismantle the existing kiln to below the start of the arch, and to sort and clean the bricks. The bricks used were fire bricks of various kinds. I must admit to having known little about the construction of outdoor kilns before this weekend, and I still have a lot to learn! For a start, I was amazed to find out how many different kinds of bricks there were. The kiln has a inner lining of high firing bricks that can withstand stoneware firing temperatures (up to 1300 degrees centigrade), and then an outer lining of insulation bricks of various kinds which have a lower temperature threshold and are used mainly as an additional lining to prevent heat escaping from any gaps in the course of fire bricks.
 |
| Getting organised |
 |
| Red insulation bricks in piles |
Whilst a group of us were cleaning and sorting the bricks, Andrew (our star technician) and Steve set about making the former on to which we would construct the brick archway:


Eventually the arch was ready for positioning and it was all hands to the job to get it into place. People of all heights were needed - it was a bit of an up and under job!
 |
| Steady as she goes... |

View from back - arch in position
Once positioned, it was a case of starting to build the archway up against it, using the 'arch bricks' - these are tapered at one end and there were 3 or 4 different sizes with different degrees of angle... John, Steve and I had to learn quickly how to fit them together for optimal usage of the limited number of bricks and also to ensure a neat curve that would hopefully meet evenly in the middle.... We used fire clay as mortar where and when it was needed, but generally the idea is not to mortar the bricks in a kiln like this. The kiln needs to be able to expand and contract during firings and mortar either prevents this, or just falls out in the process of the kiln's movements.
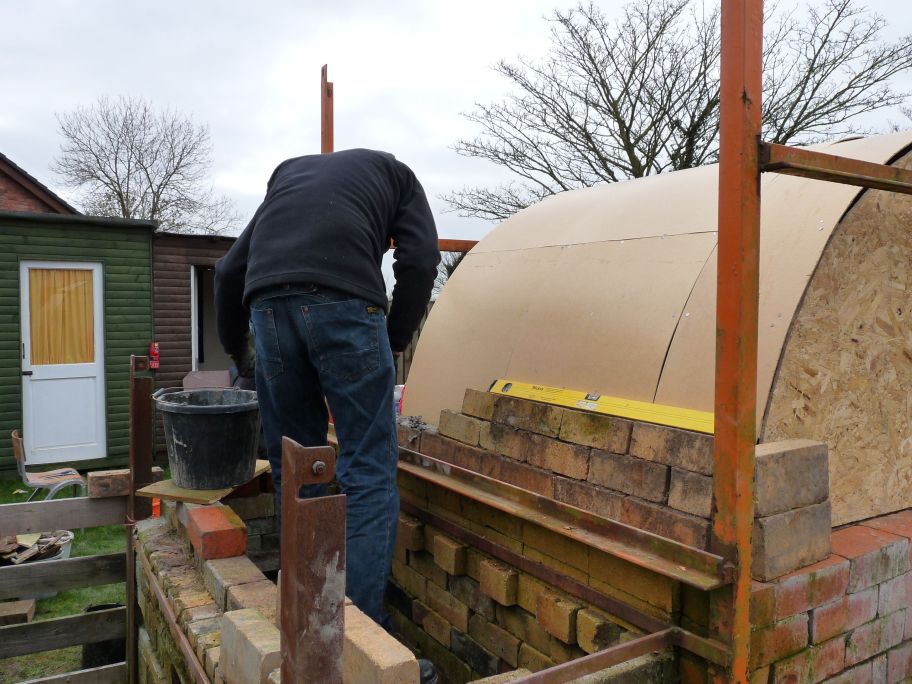
Steve's a natural at this...

At the end of Day One

Thursday, 24 February 2011
Red Dust

Part of the remit of my ceramics degree is to gain some real-life experience of working in the ceramics industry. A couple of weeks ago, I was lucky enough to be able to spend a morning with award-winning ceramic artist, Dennis Kilgallon at his Red Dust studio, based in a picturesque eighteenth century farm courtyard at Kirkharle. Dennis was kind enough to give me a tour of his studio and spend a few hours talking about his life and work in ceramics. It was a thoroughly enjoyable morning for me, I got a true flavour of what life as a working potter is really like.
Dennis specialises in large outdoor sculptures - with designs influenced by the ancient mythologies and artefacts of Greece and Cyprus; he's been resident at Kirkharle for ten years now and his studio is crammed with all manner of equipment associated with the making of large-scale ceramic works, including a vast and pretty sophisticated trolley kiln. He creates press-moulded pieces, using plaster moulds initially to get the basic outline for the piece, and then painstakingly hand-finishes and glazes each object to create a unique sculpture.


Dennis seems to work on a large scale in every sense! His making process goes through a number of steps, starting with the creation of a mould 'template' sculpted from a styrofoam block which is, in turn, pressed into a clay block which is then used to make the plaster mould into which the final clay sculpture is press-moulded.
Given that the sculptural pieces are so big, it is important to have a kiln that it large enough to take a number of objects in a single firing and thus (amongst other reasons) keep ever-rising energy costs down. The trolley kiln is a wonderful piece of engineering and technology with an internal firing area of 64 cubic metres. Firings can take up to 4 days to complete and, although the process could be fully automated using digital monitoring equipment, Dennis really enjoys being on the premises during firings, keeping a 'hands-on' overnight vigil. He keeps meticulous records of all his firings and has kiln ledgers going back over the full decade at Kirkharle, using his own coded system for recording the outcomes of firings - successes and failures (and yes, even after 10 years he still does have the occasional firing disaster!).


I was astonished to learn that some of the larger sculptures can take up to 12 weeks drying time before firing! There is a dehumidifying area at Red Dust for the purpose of ensuring a steady and even drying process - critical for large clay pieces where all the usual stresses and strains of drying clay are multiplied. Dennis was telling me that the recent freezing winter weather has been great for getting work dry as the atmosphere in the studio has been nowhere near as moist as in a typical damp Northumberland winter.
From speaking with various potters, Dennis included, I'm beginning to appreciate that one of the most difficult aspects of being a working potter is the amount of time that one needs to spend in promoting and selling work. This is obviously essential in order to make a living - but it does take you away from the real enjoyment of working in clay. Each year Dennis takes part in a number of UK and international contemporary ceramics and crafts events in order to get his work seen - and hopefully generate some sales as a result. These events involve a great deal of preparation and logistical planning in order to safely transport large-scale ceramic objects to various venues around the UK and elsewhere.
It was great to visit Red Dust and chat with Dennis, who was so generous with information about his current work and stories about his career in the ceramics industry. I learned such a lot in a single morning and am really looking forward to going back and seeing him at work making some of his lovely sculptures.

A bit more about Kirkharle...
Birth place of the famous landscape designer, Lancelot 'Capability' Brown, Kirkharle is home to a variety of artists and craftsmen who make and sell hand-crafted wares of all kinds on the premises: http://www.kirkharlecourtyard.net/shops/shops.php It is a very beautiful and idyllic setting for a studio, and a fascinating place to visit, not only because of the variety of crafts and artwork, but also because the place itself has such an interesting history and the buildings are so charming and full of character. There is also a superb cafe and various shops selling local food produce so, if nothing else, it makes a lovely stop off for a cake and cuppa. Oh and there's a plant nursery too!
Monday, 7 February 2011
Flops, props and bricks
Right, time to get back on topic!
I've spent an interesting day in the ceramics studio at College. I arrived early, keen to see what had become of my low-fired glaze tests for the piece of work with clay circles (see: http://ambientceramics.blogspot.com/2011/01/going-round-in-circles-as-usual.html. Glazing for me has always been a bit of a black art; I've never really got to grips with it, and so I'm always prepared for the worst! I wasn't disappointed :-) I've found, over the past couple of years, that it's always best to laugh when glaze tests go wrong rather that get depressed about it. Why? Well, it's not as if you can do anything about it once things go wrong, other than learn from the errors and get cracked on and do some more testing - and hope it works out better next time. This is done so much more easily in a cheerful mood than a black one!
I have to admit that I laughed out loud when I saw this:-


I've spent an interesting day in the ceramics studio at College. I arrived early, keen to see what had become of my low-fired glaze tests for the piece of work with clay circles (see: http://ambientceramics.blogspot.com/2011/01/going-round-in-circles-as-usual.html. Glazing for me has always been a bit of a black art; I've never really got to grips with it, and so I'm always prepared for the worst! I wasn't disappointed :-) I've found, over the past couple of years, that it's always best to laugh when glaze tests go wrong rather that get depressed about it. Why? Well, it's not as if you can do anything about it once things go wrong, other than learn from the errors and get cracked on and do some more testing - and hope it works out better next time. This is done so much more easily in a cheerful mood than a black one!
I have to admit that I laughed out loud when I saw this:-

Oh dear! Those rings were stood upright when it went into the kiln. Bit of a technical challenge ahead, I fear.
The glazes were actually okay (ish), but obviously the slumping and warping of the circular sections was not really the effect I'd hope for! As Andrew (our 'Master-Technician-and-all-round-Star-of-the-ceramics-studio' (more about him later!)) said, "that was a very useful test" :-) So, how can I learn from what happened and resolve the issues for my final piece? I received a lot of good suggestions from my tutor Jess, and from Andrew:
- Lower firing to 1100°C or less.
- Make the circular sections separately so that they can be fired flat or supported and then be fixed to a base after firing.
- Fire upside down, with the base suspended and let gravity do its work on the suspended rings.
- Leave at bisc firing and don't fire further....
I've decided to try firing to a lower temperature first of all, simply to find out what will happen, and to see how far we can push the limitations of the clay body. If that works out okay, then great; if not, my next test will be to try firing the piece upside down. In case neither of these work, I've also made a pile of clay rings in stoneware buff, porcelain and red earthernware clays to try out different ways of firing, mounting and glazing the rings.

This is (what will be) my final piece, currently sitting in Andrew's cupboard
patiently awaiting further glaze and firing test results.

Front view.

Looking into the vortex...
(I took all of these pictures in the Ceramics Studio photography area.
This has appropriate lighting and backdrops, etc. Quite a nice little resource)

A smaller test piece.

The above pictured test piece now in the spray booth, having been sprayed with black iron oxide mixed with water. This should give the unglazed clay a little 'warmth' and a more toasty, finished colour.

I was really pleased with the way the oxide landed on the piece in bands of different thicknesses.

Somehow this distribution of the oxide spray emphasises the shadowy nature of the piece.

Close up of oxide-sprayed work.
The test piece is now in the kiln beginning its firing to 1100°C, propped against all manner of kiln furniture in an attempt to prevent slumping... So it's a case of wait and see what happens now.
Jess seems quite keen on my idea to make this work on a bigger scale and we were discussing how this might be done. Bricks were mentioned - and to be honest I've always had a bit of a fascination with bricks so my ears pricked up at the idea. Don't ask me why I'm fascinated by bricks; I guess they're just, literally, basic building blocks and as such are quite appealing. I've never really considered making my own before though! So far, I haven't been able to find any circular brick sculptures (I wonder why!) - this is the nearest I can find: http://sykesgallery.tripod.com/bt_big.html. Anyway, I feel that the germ of an idea has now been planted....
Hope to return with more firing test results later in the week...
Sunday, 6 February 2011
Goosebumps
Well I can't really let this day go by without mentioning the match, can I? WHAT a game! If anyone is ever looking for a definition for the phrase, "football is a game of two halves", then they need look no further than the Newcastle-Arsenal game today. 4-0 to Arsenal by half-time, and Newcastle looking completely destroyed in one of the worst first half efforts I've ever seen at SJP, and then.... (dunno what Pardew said during the half-time team talk, but he needs to keep saying it!) almost victorious at 4-4, in a fast and furious second half where Newcastle were just ON FIRE!
Brilliant brilliant game. Lindsay summed it up after the 4th Newcastle goal went in, "I've got goosebumps from top to toe, I feel like I've been drinking champagne!".
The crowd noise was just amazing. Imagine if we'd got that 5th goal! I reckon they'd have heard us in Sunderland. Oh... the trials and tribulations of supporting Newcastle Utd.


And as for Handy Andy Carroll? Was he a victim or a victor of his own success? Will we ever know?
It's really sad that he's gone, he was so exciting to watch and worked so hard for the team. And he got us plenty of goals which was the main thing!! He was also one of our (few!) hopes for the future. I don't blame him for going - it's (probably) a good career move and it'll likely set him up for life financially (well it ought to!!) and broaden his horizons... maybe. It's just a shame that things always seem to boil down to money. It's depressing that we wont get to see him play again at SJP in black and white, and it's going to be interesting to see the crowd reaction when he returns home with Liverpool....
Ceramics news to follow....
Brilliant brilliant game. Lindsay summed it up after the 4th Newcastle goal went in, "I've got goosebumps from top to toe, I feel like I've been drinking champagne!".
The crowd noise was just amazing. Imagine if we'd got that 5th goal! I reckon they'd have heard us in Sunderland. Oh... the trials and tribulations of supporting Newcastle Utd.


It's really sad that he's gone, he was so exciting to watch and worked so hard for the team. And he got us plenty of goals which was the main thing!! He was also one of our (few!) hopes for the future. I don't blame him for going - it's (probably) a good career move and it'll likely set him up for life financially (well it ought to!!) and broaden his horizons... maybe. It's just a shame that things always seem to boil down to money. It's depressing that we wont get to see him play again at SJP in black and white, and it's going to be interesting to see the crowd reaction when he returns home with Liverpool....
Ceramics news to follow....
Saturday, 29 January 2011
Sketchup and a cheap copy of Microsoft Office
As I'm not particularly good at drawing and often struggle to put my design ideas down on paper, I've been doing a bit of experimenting with Google's 3D modelling tool, Sketchup: http://sketchup.google.com/intl/en/index.html
I'm hoping I can use Sketchup to help visualise my ceramic ideas during the early design phases, before clay models are made. I have to say that I'm really impressed with it so far: it's free and it's really easy to use and there are hundreds of pre-created shapes and surfaces that can be adapted to suit almost any design project. It has built-in 'living' surfaces such as grass, tree bark, sky and water, as well as brick, metal, plastic, etc. It even does shading according the global time of the model - i.e. month and hour of day! Brilliant.
There are extensive online resources to help anyone new to Sketchup and training videos to suit all levels: http://sketchup.google.com/intl/en/training/ There's also a 3D warehouse of ready-made models and designs, many of which are freely available to use.
This is my first attempt at modelling the piece I've made for my current project:

I haven't quite got all the shading and layout right but you can immediately see the potential and, even at this first attempt, I don't think it's half bad. It took me about 2 minutes. I didn't bother watching any of the tutorial videos either, so if I take some time to watch those I guess I'll be able to make a better attempt next time.

Whilst on the subject of useful software, if you're a student and you want to obtain a copy of Microsoft Office then have a look at Microsoft's Ultimate Steal offer which gives students a big discount on the full price: http://store.digitalriver.com/store?Action=DisplayStudentHeroRegistrationPage&Locale=en_GB&SiteID=msshgb - you will need to use your official University or College email address to check your eligibility for the offer.
I'm hoping I can use Sketchup to help visualise my ceramic ideas during the early design phases, before clay models are made. I have to say that I'm really impressed with it so far: it's free and it's really easy to use and there are hundreds of pre-created shapes and surfaces that can be adapted to suit almost any design project. It has built-in 'living' surfaces such as grass, tree bark, sky and water, as well as brick, metal, plastic, etc. It even does shading according the global time of the model - i.e. month and hour of day! Brilliant.
There are extensive online resources to help anyone new to Sketchup and training videos to suit all levels: http://sketchup.google.com/intl/en/training/ There's also a 3D warehouse of ready-made models and designs, many of which are freely available to use.
This is my first attempt at modelling the piece I've made for my current project:

I haven't quite got all the shading and layout right but you can immediately see the potential and, even at this first attempt, I don't think it's half bad. It took me about 2 minutes. I didn't bother watching any of the tutorial videos either, so if I take some time to watch those I guess I'll be able to make a better attempt next time.

Subscribe to:
Posts (Atom)