Pages

Sunday, 10 June 2012

Newcastle College's School of Creative Industries hosts Final Shows this week


Just a quick note to say that the Preview Evening of my Final Show on the FdA Contemporary Ceramic Practice takes place on Monday, 11th June from 6pm until 9pm, with viewings available until Thursday, 14th.  Details below:


It's definitely worth a visit - not just for our ceramics exhibition which offers a very interesting mix of styles and genres this year - but also for the really excellent work of the students of graphic design,  fashion, interior architecture and photography.  There's no shortage of amazing new talent in the School of Creative Industries, so much so that Final Shows comprise a huge exhibition of work stretching over two buildings. 

Don't miss it!  

Monday, 7 May 2012

Making a plaster cast of a fish

When my friend, Linda Scott-Robinson's husband, Tony asked me to make him some ceramic salmon for his garden, I have to admit that I was less than enthusiastic. I don't know why, but I've just never been a big fan of making pot 'creatures'. However, I said 'okay' and set about experimenting with the shapes and colours of river salmon. Tony drew the shape he wanted and I made a flat test piece directly from his drawing. I covered it a right old mix of glazes and suddenly began to feel a lot more curious about what could be achieved with this here fishy business...


I knew, of course, that the thing needed to be more dimensional and robust to survive the rigours of life in a North Northumberland country garden. Tony (being an award-winning fisherman!) duly supplied me with a real (dead of course!) salmon from which I could make a plaster cast... Oh heck.... I definitely didn't fancy that idea!!

Linda dropped off the fish at my office and I stored it in our staff kitchen fridge icebox until home time, much to the amusement of my colleagues who seemed to think it was an excuse for a 'stream' of pretty bad fish-related puns... On getting the fish home, I quickly put it into the freezer and tried to forget about it.

After a week of it being there, I realised that I'd have to face up to the task of casting it. I got it out of the freezer on Friday night and placed it in a long tub of cold water to defrost... in the garage... On Saturday morning, I had a tentative look at it. It was slimey and horrible and still a bit frozen but it didn't smell much, so I proceeded to rinse it with fresh water and gently clean the slime off, taking care not to damage the skin. After several flushings with cold water and a good pat dry with a bath towel, it looked like it might be dry enough to cast.

Here's a list of all the things I used when casting the fish:

· large quantities of any old poor quality, softish, reclaimed clay 
· 20 pints of water 
· 10 kilos of casting plaster 
· large wooden spoon, large plastic whisk
· large bucket, glass jub
· various pottery tools - loops, ribs, kidneys, scoops, wires, pins...
· long strip of lino
· strong tape and garden wire 
· plastic-backed cloth 
· old towel 
· dust mask

Here's the steps I took:

1.      Lay a large slab of clay on to the cloth. The clay should be as long and wide as the fish with an additional 3 inches all the way around. Make it as even in height as possible across the full length.


2.      Trace the fish shape on to the clay and begin to scoop out enough clay so as to be deep enough to insert half of the fish along its length into the clay slab:


3.      Keep testing the size and shape of the hole and scooping out more clay until the fish fits perfectly, with exactly half of its body above the clay and half inserted. Finally, lay the fish into the clay slab and carefully spread the fins and tail, gently pressing in so that they too are half immersed in the clay. Ensure that the area around the fish-shaped hole is smooth and flat (the flatter and more even it is, the tighter the finished mould will be):


4.      Watch out for the fish sagging over the edge of hole - and compensate for this by cutting the hole bigger if necessary. Sagging on to the top of the clay will create an 'undercut' and make it difficult - or even impossible - to remove clay work from the finished cast.
I really don't like this image, but it does illustrate the saggy nature of a dead fish !


5.      Create locating holes by pressing the handle of a turning tool into several areas of the clay surface. Create a solid 'funnel-shaped' piece of clay and cut this in half along its length, fit on to clay surface flat side down, as shown below. This will create a funnel into which casting slip can be poured (mine is probably a bit narrow). Note in the background all the various tools used in scooping and tidying the clay slab:


6.      Now surround the whole thing with a strip of lino that is tall enough to allow for at least a 3 inch thickness of plaster to be poured on top of the fish.


7.      Secure the lino with tape and/or wire or string. Push plenty of clay up against the outside of it to form a tight seal against the clay inside. My lino was a bit floppy because it was brand new, so I added some wooden boards for support. Using an older, stiffer lino or some metal flashing would have been better.


8.      Time to add plaster... I use the 'island method' for making plaster. I decided that I needed about 10 pints of water to cover the fish and build up the 3 inch thickness. I put all of the water into a bucket, donned my dust mask and then scooped in plaster bit by bit until there was enough plaster in the water to form a little island of dry plaster above the surface of the water. I then gently stirred the plaster with the plastic whisk and wooden spoon until it was smooth and creamy, but not bubbly. Once the plaster began to thicken a little, I poured a thin layer over the whole fish, and ensured a good covering. (Some horrible mucus seeped out of the gills during this process and floated on top of the plaster - I had to remove this carefully by simply laying a sheet of kitchen roll on to the surface of the plaster to soak it up... yuk). I gradually added all of the plaster until the bucket was empty. It's important to get all of the air out of a plaster mould otherwise you end up with holes that can spoil the finish and even cause the mould to crack or break. Gently bang the workbench and sides of the lino to encourage bubbles to burst. Now leave the plaster to set. I don't know how long it should be left for! I'm an impatient sort of person... I left it about half an hour, then removed the lino and flipped the mould upside down and gently removed the clay to reveal a fish embedded in plaster! (It wasn't stuck)


9.      Now to make the matching cast of the other side. Gently clean any clay or other debris from the fish. Add the other half of the pouring funnel, then coat the entire cast (not the fish!) in a thin layer of clay slip using a brush and ensuring that no bare patches of plaster are showing through the slip. Once again, enclose the whole cast in lino and seal tightly leaving at least 3 inches of thickness for plaster above the fish. Make up another bucket of plaster and add it to the mould pretty much in the same way as before. Leave to set. Remove the lino and you will end up with something looking like a fish sarcophagus:


10.  The next bit is tricky... separate the two halves of the mould. Depending on how careful you've been with the slip between the moulds, you may need to work a groove between the two halves in order to separate them. (I ended up shoving a kitchen knife between to the two pieces to break them apart and, in the process, chopped off one of my 'locating nuts'!)


If all goes well, eventually the two halves should come apart revealing a fish-shaped mould ready for use...


I'd like to say that no fish were hurt in the making of this mould, but that wouldn't really be true. Admittedly the fish was already dead by the time I got it to make the mould.
I did feel a bit sad though - it was a lovely looking fish.

Definitely a one-off experience for me!

FIN


Special thanks to Paul Allen from Newcastle College who taught me everything I know about how to make a slipcast mould.


Sunday, 6 May 2012

Rolling clay slabs

There are a number of seemingly straight-forward tasks that can cause all kinds of problems for a student potter.  For example, the making of large, good, flat slabs without the luxury of a mechanical slab roller can be a real pain.  Apart from the sheer effort of bashing several kilos of clay into submission, it is always a challenge to ensure even thickness, and bubble-free, perfectly flat surfaces that wont distort under firing. However, when making large slabbed work, the preparation of the clay is critical to success so it is worth making the effort to get things right.

One of the first problems with working with anything bigger than fairly small-sized slabs is that the clay has a tendency to stretch under its own weight when you flip it over between rollings...

To get around that, I've learned to always, always roll out clay on a sheet of cloth.  This also serves to keep the clay clean and grit free (especially important if working with porcelain) and prevents it from sticking to the workbench.  I've found that the best cloth for this purpose is flock-backed cheap plastic tablecloth (the kind that can be bought from Poundland in quantity! Thank you to Jess for that top tip.);  this can be cut to size and washed and reused many times.  

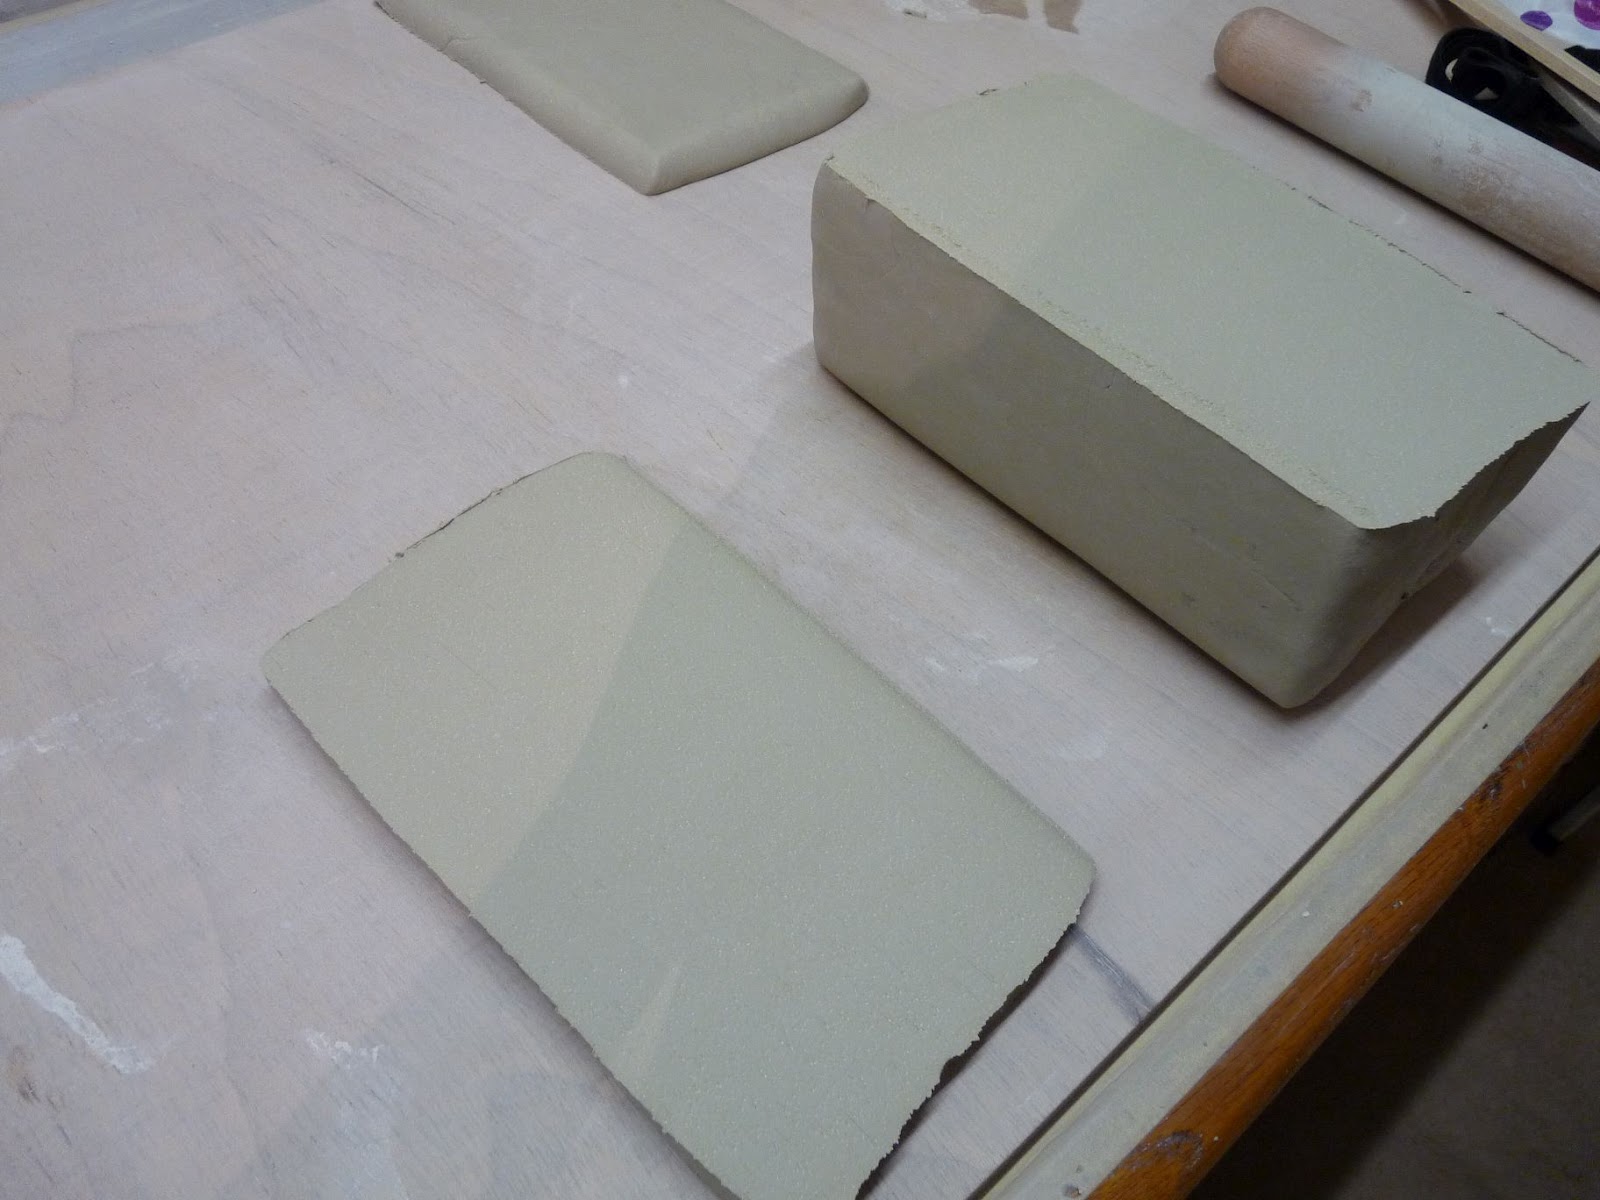
Before beginning to roll out the slab, I stop and think about the desired final shape of the slab - is it rectangular, square, round, other...  ?  Whatever shape I want, I try to start with a block of clay that looks like it might roll into that shape! From the bag, I wire off a large lump of clay, trying to avoid tearing or folding the clay. I then bash this into shape using a combination of repeatedly dropping on it to the workbench, thumping with my fist and patting into shape, again avoiding tearing or folding. Depending on the size of slab I want, I may cut this larger lump into multiple thick slabs. If the clay is uneven in thickness to start with it, it will stretch and bulge in all the wrong places when rolled.  The ideal tool for cutting thick starter slabs is a metal harp as this gives a lovely, controlled, even cut:


Once I've got my clay ready, I lay it on a piece of cloth that is twice is as big as the slab I'm going to roll and begin rolling. I use a long straight-sided rolling pin. A pair of wooden slats of even height serve as guides. (It pays to have a good supply of pairs of wooden slats of varying heights.)


It's necessary to frequently turn clay between rollings in order to ensure optimum and even stretching without dragging or sticking;  this is where the tablecloth comes in very useful. To flip the clay, I fold the tablecloth in half over the clay and then flip the whole thing over, peel back the cloth and carry on rolling the clay on the other side:


The use of the cloth in this way is extremely effective with really large slabs as it maintains the shape and prevents unwanted stretching between flips.  If the clay is particularly sticky it will stick to the rolling pin, so it might be necessary to roll it sandwiched in between the cloth - i.e. just roll on the cloth rather than the clay.  However, it's better if the clay isn't so damp that it sticks to the rolling pin; keeping the rolling pin wiped cleaned between rolls will make this less likely to happen too.

So that's my technique for rolling slabs; other potters may have better methods but that'll work fine for me until I have room to accommodate a proper mechanical slab roller!

For my next trick - making a plaster cast of a 20 inch salmon...  watch this space....


Monday, 2 April 2012

The perfect spring day spent at Yorkshire Sculpture Park


On Friday, 23rd March, Simon and I decided to have a day away from work and head for Yorkshire Sculpture Park to see the Joan Miro Exhibition.  We'd been meaning to go and have a look at YSP for about a year and were full of excited anticipation about what we might find there - as if Miro wasn't enough!

Getting to YSP was a breeze;  we came off the M1 South at Junction 38 and there it was!  YSP has an interesting history, set in the beautiful Bretton Estate, once upon a time the home of knights - and playground of kings. These days it depends entirely on public donations and Arts Council funding. Parking costs £5 for the day but there are no other mandatory charges for entry.  There are a number of car parks to choose from depending on whether you want to start your tour indoors or outdoors; tickets are transferable so you can move your car around during the day - and it's even possible to catch a shuttle bus between the galleries on site. I'd advise you to just park up and walk around though.  Bretton Estate and Country Park are impressive and extensive, with beautiful woodlands, meadows, lanes, gentle hills and even a lake; and at every turn there are breathtaking artworks by some of the world's best artists and sculptors - past and present.

Anthony Caro - Promenade.  What a contrast!

YSP provides non-stop sensory pleasure from the minute you get there until the minute you leave!  Simon and I arrived at 10am and left at 6pm and still didn't manage to get to see everything - we plan to return for the Anish Kapoor exhibition in June so we can go to some of the areas we missed. 

Whatever you do - make sure you explore Basket#7! It's fab.
A particular favourite for us both was the work of Henry Moore, of which there are many superb examples at YSP.  It was lovely to be able to see his pieces in real life and appreciate the true scale of them...  to trace their continuous lines and closely examine their carefully worked surfaces.... and even lay your cheek against the curves of metal warmed in the winter sunshine.  Ah.... Heaven.


So, to the Miro.... what can I say?  Lovely.  Lovely, stunning, exciting, funny, lively, impressive.... but most of all it is just bursting with freedom of expression - and was just incredibly inspiring!


The Miro exhibition is complemented with excellent informational resources which help the visitor to get a true picture of what Miro was like as a person - his methods of working and his aspirations - but if you want to get a further insight into the legend of Miro, have a listen to Mark Lawson's Front Row interview with Miro's sons during the opening of the YSP exhibition earlier this year:
http://www.bbc.co.uk/iplayer/episode/b01d2h3h/Front_Row_Miros_grandsons_on_his_sculptures_The_Devils_on_DVD/

I took 300 photographs during my visit to YSP and could honestly write pages and pages about how wonderful the place is and give away all of its delights here in pictures... but that would just seem like a spoiler for the surprises in store.  So all I have to say to any reader here is:  Go!


Click to enlarge


The Miro Exhibition is on until 6th January 2013, Anish Kapoor's exhibition arrives June 2012.   Pick a nice day (don't go in the rain), pack a luxury picnic and a sturdy pair of shoes and prepare to be WOW-ed!

Monday, 19 March 2012

Eight By Eight Fine Art Exhibition - 17th to 31st March 2012

This Saturday past I visited the Eight By Eight exhibition at the Newcastle Arts Centre on Westgate Road in Newcastle.  This is an annual exhibition of ceramics, paintings, sculpture and 3D design work of 8 selected staff and students of Newcastle College Art Departments, covering many styles and genres. The exhibition this year offers an incredibly vibrant and colourful display in a lovely venue.

If you've never been to the Arts Centre, it's well worth a visit if you're in town.  There is a great artists' materials shop, a lovely gift shop, a cafe, a pub and a pottery all within the same very interesting, old-fashioned courtyard complex!


Lovely cake stands by Jess Cohen, tutor on FdA


Beautiful sculptural work by Christine Constant - tutor on the FdA

Sara Mann

A very interesting piece


Sunday, 8 January 2012

Introducing 6th Morpeth Scout Group and their Amazing Earthenware Christmas Freak Show


I've definitely lost a bit of momentum with my blog lately. I spend a huge percentage of my life at a keyboard and lately it's all got a bit much! I'm beginning to feel as if I'm actually living through my keyboard these days. So, although I don't really have any real New Year Resolutions as such (mainly because I'm hopeless at keeping to them), I have resolved to spend less time at the computer and more time doing stuff.  If nothing else, I'll probably write fewer words on my blog posts this year.  Probably.

But first... I have to write some words about one my favourite ceramic events of 2011....

Boys, this is a snowman!
During November, at the request of Silmara Hodge, Scout Leader, I had the pleasure of running a ceramics workshop with the 6th Morpeth Scouts' Discovery and Rover Groups in order that they could gain their Craft Badges.  My class consisted of 18 Boy and Girl Scouts, aged from about 10 to 13 years old plus a couple of the adult helpers who couldn't resist joining in too. Given the closeness to Christmas, I decided we'd make ceramic snowmen lanterns.

During the workshop we covered coiling, pinching, joining, slip decoration and worked with white earthenware (snowman coloured see?) as our body. It was great fun; my class included a lot of very creative young people, but I'm not sure that many of their finished articles could be classified as 'snowmen' as such! We ended up with all kinds of weird and wonderful creatures. I learned a bit that day, myself, about giving workshops to young people!  I had a very specific objective in mind and quite definite plans about how we were going to achieve it. Within the first half hour, I'd set those plans to one side and found myself advising not on how to add a scarf or a hat or a carrot nose to a snowman but rather how to add tentacles to a monster, a mohican hairstyle to a glam rock star, an abducted dog under an alien's arm and even how to apply a coat of green paint to Yoda!

The boys in the group were definitely much keener to make monsters, aliens, anything other than snowmen whereas the girls (including the 2 adult female helpers) did, in fact, make some recognisable and very lovely snowmen, including a really delightful 'Harry Potter' snowman complete with wand and magic broomstick. All in all... clay, colour, imagination and skill all combined to give some pretty amazing results and everyone ended up with an impressive 'lantern' of some kind.


Donny Darko and friend
Glam rocker
Lock up yer dogs

!!
Ok, Libby, show 'em how it's done

True freaks!


Just love the concentration here
 (and the colour scheme of course!).


Talking of colour schemes....

Well done 6th Morpeth Scouts! You were brilliant!
 Many thanks also to Silmara and Alex Hodge for inviting me to do the workshop, and to Patrick Smith, fellow student from Newcastle College for invaluable assistance on the day.