I knew, of course, that the thing needed to be more dimensional and robust to survive the rigours of life in a North Northumberland country garden. Tony (being an award-winning fisherman!) duly supplied me with a real (dead of course!) salmon from which I could make a plaster cast... Oh heck.... I definitely didn't fancy that idea!!
Linda
dropped off the fish at my office and I stored it in our staff kitchen fridge
icebox until home time, much to the amusement of my colleagues who seemed to
think it was an excuse for a 'stream' of pretty bad fish-related puns... On
getting the fish home, I quickly put it into the freezer and tried to forget
about it.
After a
week of it being there, I realised that I'd have to face up to the task of
casting it. I got it out of the freezer on Friday night and placed it in a long
tub of cold water to defrost... in the garage... On Saturday morning, I had a
tentative look at it. It was slimey and horrible and still a bit frozen but it
didn't smell much, so I proceeded to rinse it with fresh water and gently clean
the slime off, taking care not to damage the skin. After several flushings with
cold water and a good pat dry with a bath towel, it looked like it might be dry
enough to cast.
Here's a
list of all the things I used when casting the fish:
·
large
quantities of any old poor quality, softish, reclaimed clay
·
20 pints
of water
·
10 kilos
of casting plaster
·
large
wooden spoon, large plastic whisk
·
large
bucket, glass jub
·
various
pottery tools - loops, ribs, kidneys, scoops, wires, pins...
·
long
strip of lino
·
strong
tape and garden wire
·
plastic-backed
cloth
·
old towel
·
dust mask
Here's the steps I took:
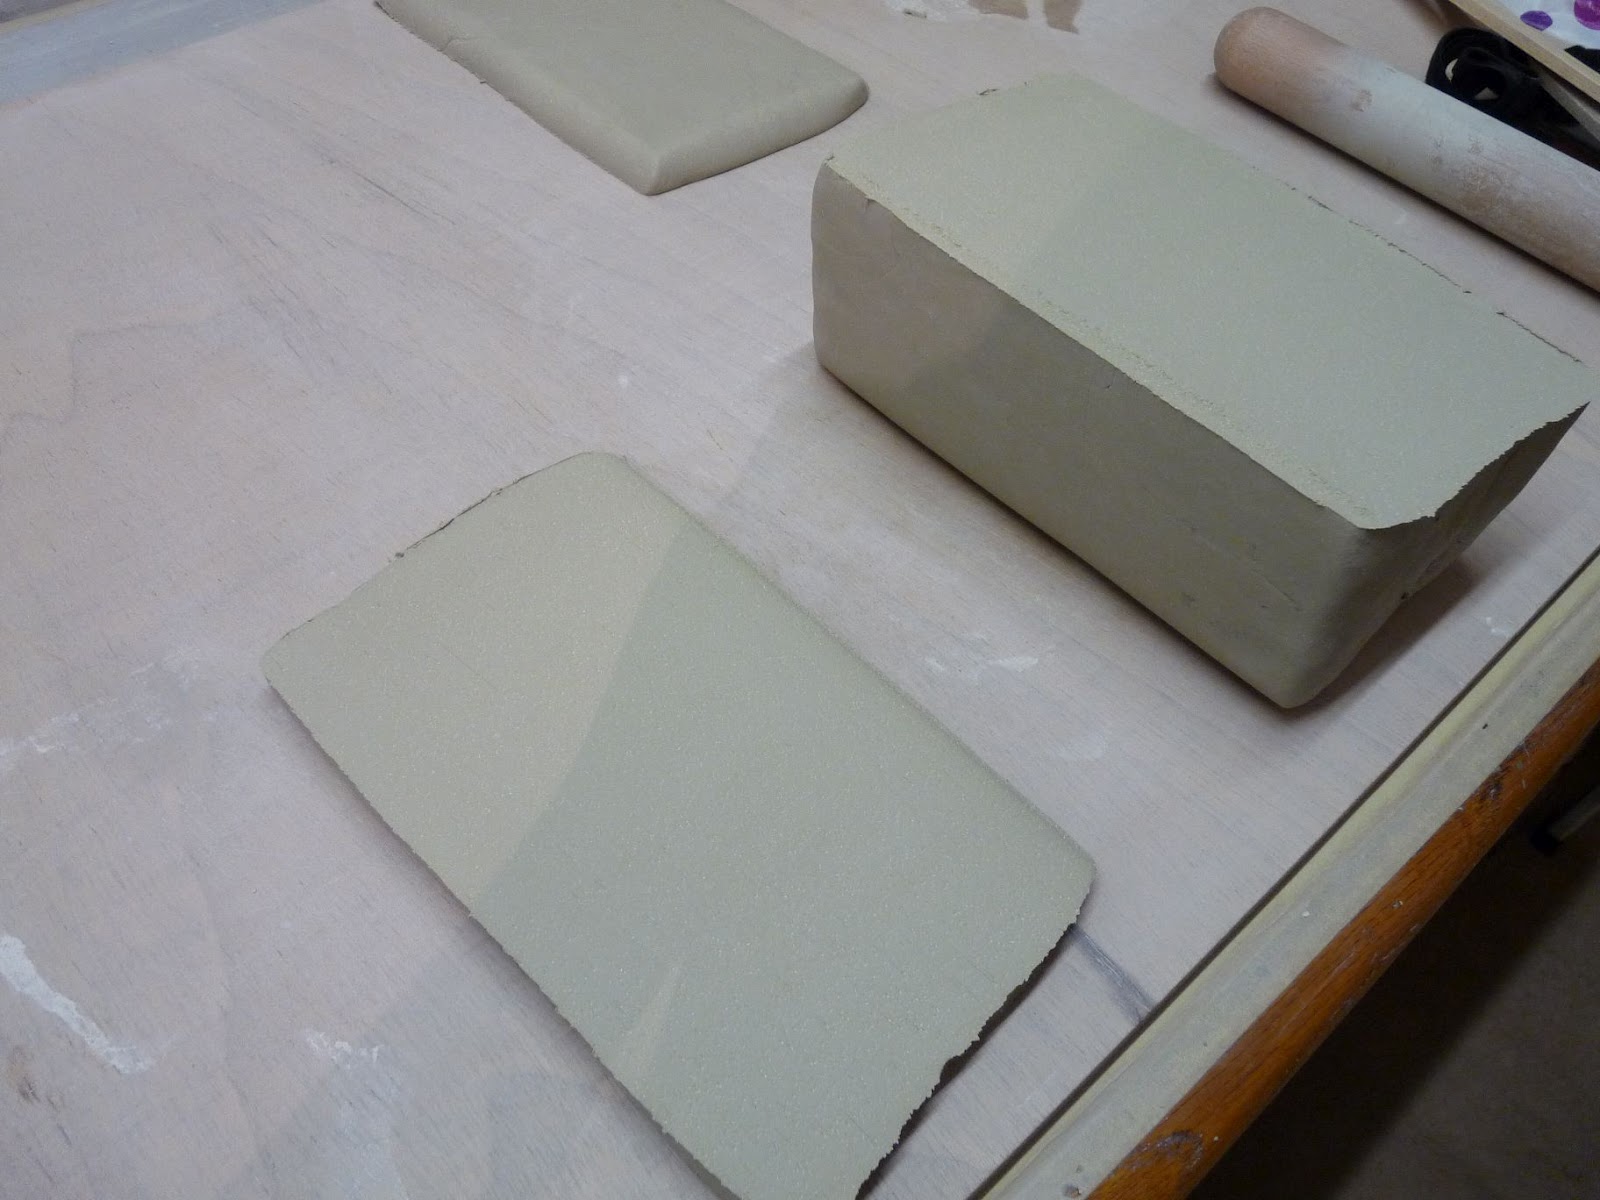
1. Lay a large slab of clay on to
the cloth. The clay should be as long and wide as the fish with an additional 3
inches all the way around. Make it as even in height as possible across the
full length.

2. Trace the fish shape on to the
clay and begin to scoop out enough clay so as to be deep enough to insert half
of the fish along its length into the clay slab:

3. Keep testing the size and shape
of the hole and scooping out more clay until the fish fits perfectly, with
exactly half of its body above the clay and half inserted. Finally, lay the
fish into the clay slab and carefully spread the fins and tail, gently pressing
in so that they too are half immersed in the clay. Ensure that the area around
the fish-shaped hole is smooth and flat (the flatter and more even it is, the
tighter the finished mould will be):

4. Watch out for the fish sagging
over the edge of hole - and compensate for this by cutting the hole bigger if
necessary. Sagging on to the top of the clay will create an 'undercut' and make
it difficult - or even impossible - to remove clay work from the finished cast.
 |
| I really don't like this image, but it does illustrate the saggy nature of a dead fish ! |
5. Create locating holes by pressing
the handle of a turning tool into several areas of the clay surface. Create a
solid 'funnel-shaped' piece of clay and cut this in half along its length, fit
on to clay surface flat side down, as shown below. This will create a funnel
into which casting slip can be poured (mine is probably a bit narrow). Note
in the background all the various tools used in scooping and tidying the clay
slab:

6. Now surround the whole thing with
a strip of lino that is tall enough to allow for at least a 3 inch thickness of
plaster to be poured on top of the fish.

7. Secure the lino with tape and/or
wire or string. Push plenty of clay up against the outside of it to form a
tight seal against the clay inside. My lino was a bit floppy because it was
brand new, so I added some wooden boards for support. Using an older, stiffer
lino or some metal flashing would have been better.

8. Time to add plaster... I use the
'island method' for making plaster. I decided that I needed about 10 pints of
water to cover the fish and build up the 3 inch thickness. I put all of the
water into a bucket, donned my dust mask and then scooped in plaster bit by bit
until there was enough plaster in the water to form a little island of dry
plaster above the surface of the water. I then gently stirred the plaster with
the plastic whisk and wooden spoon until it was smooth and creamy, but not
bubbly. Once the plaster began to thicken a little, I poured a thin layer over
the whole fish, and ensured a good covering. (Some horrible mucus seeped out of
the gills during this process and floated on top of the plaster - I had to
remove this carefully by simply laying a sheet of kitchen roll on to the
surface of the plaster to soak it up... yuk). I gradually added all of the
plaster until the bucket was empty. It's important to get all of the air out of
a plaster mould otherwise you end up with holes that can spoil the finish and
even cause the mould to crack or break. Gently bang the workbench and sides of
the lino to encourage bubbles to burst. Now leave the plaster to set. I don't
know how long it should be left for! I'm an impatient sort of person... I left
it about half an hour, then removed the lino and flipped the mould upside down
and gently removed the clay to reveal a fish embedded in plaster! (It wasn't
stuck)

9. Now to make the matching cast of
the other side. Gently clean any clay or other debris from the fish. Add the
other half of the pouring funnel, then coat the entire cast (not the fish!) in
a thin layer of clay slip using a brush and ensuring that no bare
patches of plaster are showing through the slip. Once again, enclose the whole
cast in lino and seal tightly leaving at least 3 inches of thickness for
plaster above the fish. Make up another bucket of plaster and add it to the
mould pretty much in the same way as before. Leave to set. Remove the lino and
you will end up with something looking like a fish sarcophagus:

10. The next bit is tricky...
separate the two halves of the mould. Depending on how careful you've been with
the slip between the moulds, you may need to work a groove between the two
halves in order to separate them. (I ended up shoving a kitchen knife between
to the two pieces to break them apart and, in the process, chopped off one of
my 'locating nuts'!)

If all goes well, eventually the two halves should
come apart revealing a fish-shaped mould ready for use...


I'd like to say that no fish were hurt in the
making of this mould, but that wouldn't really be true. Admittedly the fish was
already dead by the time I got it to make the mould.
I did feel a bit sad
though - it was a lovely looking fish.
Definitely a one-off experience for me!
FIN
Special thanks to Paul Allen from Newcastle College who taught me everything I know about how to make a slipcast mould.